Files and folders are the simplest resources to add to a course. In fact, in most browsers, simply dragging a file from the desktop into your course with the editing turned on will add the file to a course. Adding files can provide a lot of information for our students, and VSTAR Learn supports many file types.
Simply by adding files to courses, we can provide our students with articles, images, videos, and sound, creating a robust learning environment.
Choosing the File/Folder Resource
In order to view all the options available, let’s add a file to the course by turning the editing on, and then selecting “Add an activity or resource.”
![]()
This will bring up the Activity Chooser menu. Scroll down to Resources, and select either “File” or “Folder,” depending on how much information you need to provide to your students. Then click “Add.”
The next page will walk through adding a file or folder.
Adding the File/Folder to VSTAR Learn
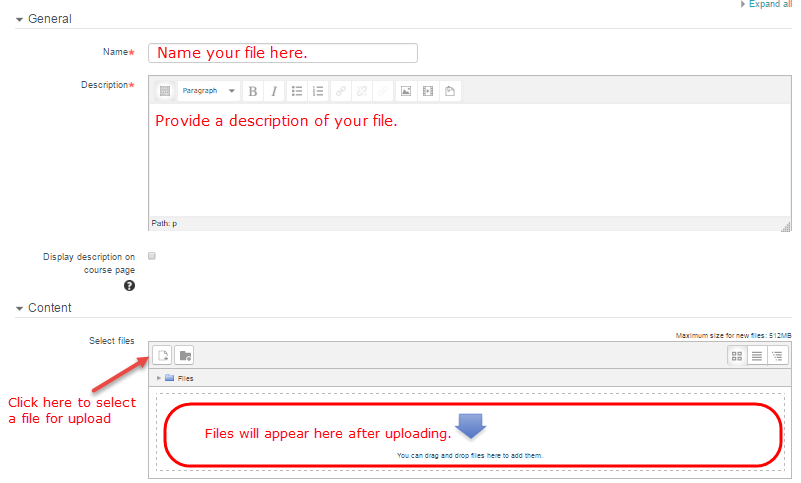
Provide the name of the file or folder and a description. There are two ways to add the file. The simplest is to drag the file over to the screen in the drag and drop area if it’s easy to access on your computer. The other way is the click “Add,” which will bring you to the VSTAR Learn’s file picker menu.
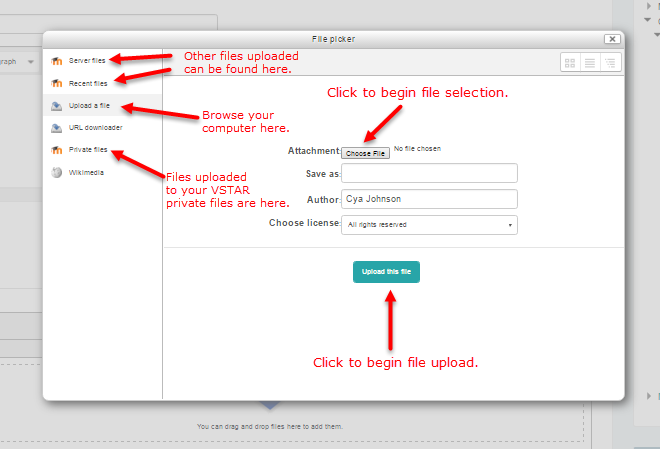
There are a few interesting things to note about VSTAR’s file picker menu. It defaults to your computer, and will let you browse to any files there. However, if you would like to pick a file that you’ve uploaded to VSTAR already, you have a few options. You can browse uploaded to your VSTAR private files by clicking on the “private files” option. Also, files uploaded recently to VSTAR or other places on the VSTAR server are also available for you to browse. Once you’e selected your file, you can upload it by selecting the “Upload this file” button at the bottom of the screen.
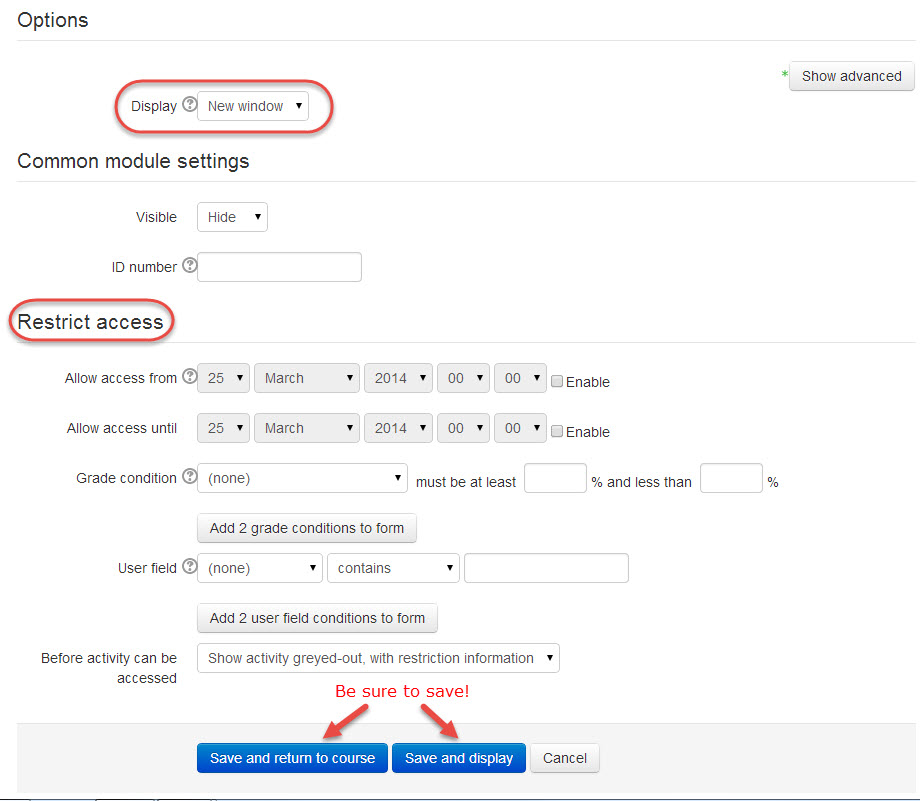
Once you’ve uploaded your file to VSTAR Learn, there are a few other choices on the screen that allow you to choose how students will view your file. Under “Options,” you can choose whether students will need to download your file, will view your file in a new window, or whether the file will be embedded in the current browser window. Keep in mind that students will likely need the software you created the file in to view the file unless it’s a common format, like a .pdf file, an .mp3 music file, or a .jpeg image file, so do try to use common file formats.
Finally, you can choose to restrict access to the file from your students until a later date if necessary.

Once you have selected the necessary options for your file or folder, be sure to save before returning to your course.


