Preparation
1. Document the process of doing something with screenshots.
2. Save all your screenshots. You may want to develop a naming convention, or put screenshots for each article in a folder.
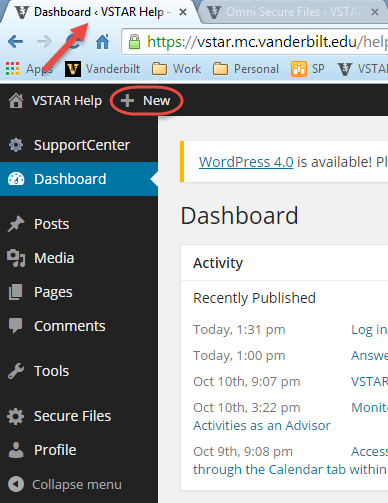
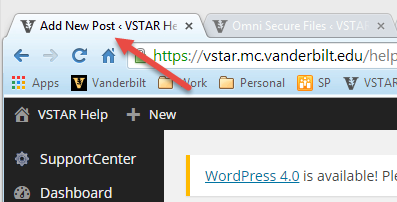
3. Log in to VSTAR Help. Use the Dashboard link to access the Help article creation interface.
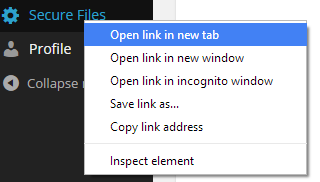
4. Right click on the “Secure Files” menu item and click “Open link in new tab.” This will give you the option of viewing and uploading your pictures at the same time you are creating your posts.
5. You should now have two tabs open in your browser. Click on the tab that says “Dashboard” and click “New” at the top to create a new post.
Write
This will open the post window. You can type your post information, categorize your post, and provide images here. If you would like to include video, talk to OEIT.
Images
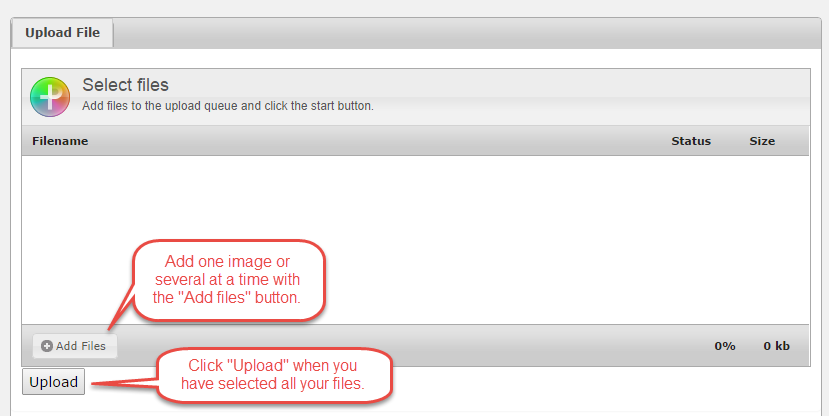
1. To add an image, you first need to upload the image using the Secure Files tab you opened. Go back to that other tab in your browser.

2. At the bottom of the page is an upload files interface. Click “Add files” to add files one at a time, or you can upload several at once. Once you’re done, you can upload files with the “Upload” button.
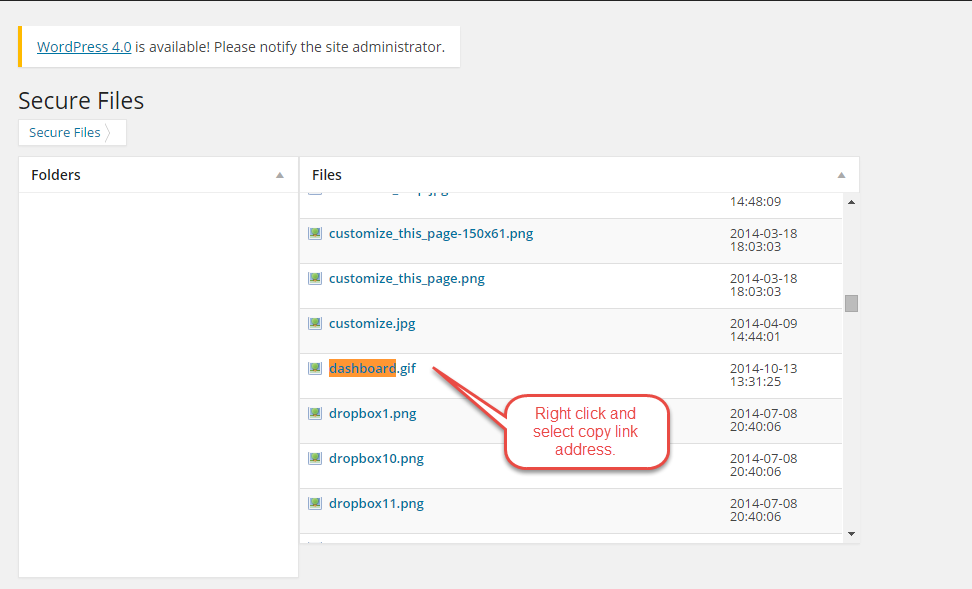
3. Now you will see a long list of files at the top. To find your file easily, hit Ctrl+F (Cmd+F on a Mac) and type the file name of your picture.
4. It should appear, and you can hit the “next” button if it’s not the first name that shows up. When you find the file, right click and select “Copy link address.”
5. Now go back to the other tab in your browser, where you are typing your post.
6. Click the button that says “Add media.”
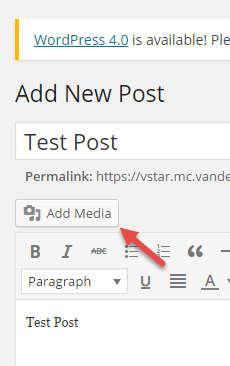
7. Select the”Insert from URL” option on the right-hand side.

8. Past the URL for your picture from the Secure Images tab, then click “Insert into post.”

Your picture should appear within your post.
Finishing
Once you have finished creating your article text, you will need to add article to a category. You can do this by checking the “Category” boxes on the right hand side. Make sure to check both a top-level category and a sub category for your article.

Finally, be sure to publish your article. The box for publishing an article is on the upper right hand side of the page. You can save your article as a draft before it is published if you need to continue working on it. You can also preview it to see how it will look before you publish it. To publish, click the blue publish button.
