Who Can Copy Courses
Only those with course coordinator permissions (or higher) at the VSTAR Learn site level can backup and restore courses. If you are unsure whether or not you have these permissions, or unsure whether you need to perform the actions outlined here, please contact us using the “open new ticket” button to the right.
What Do We Mean By “Copying?”
We call this “copying” courses, but this is actually two distinct actions – a course “backup” function and a course “restore” function. Courses are backed up automatically every week by the Education Informatics team, so the only time you really need to perform these actions is when you are moving a course from a section that’s getting ready to finish to the section that’s starting.
Backup
Before you begin, find your new course. This has been created by the Education Informatics team. Count the number of topics in the course you are backing up, and add topics to the new course to make sure that the new course has the same number of topics as the old course. You can recover topics later if you miss anything, but this will help with making sure your old course and your new course are an exact match from the beginning.
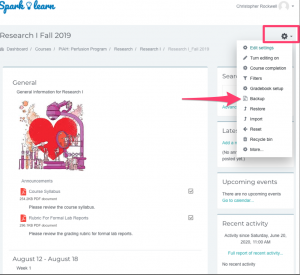
To begin the backup process, go to the Administration block on the right hand side of the course page and click the “Backup” link.
1. Initial Settings
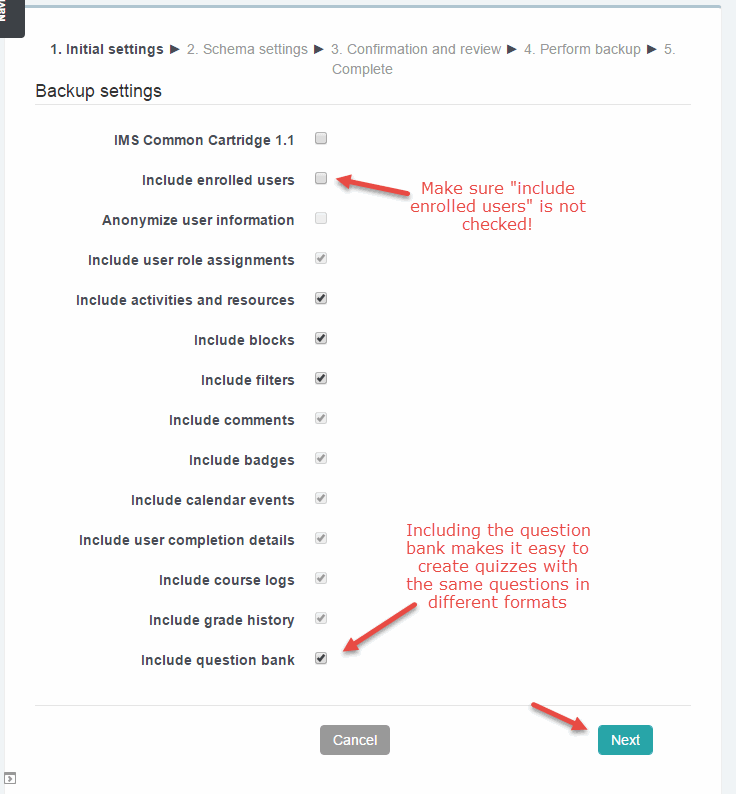
The backup dialog will begin. The process is 5 steps, and the breadcrumb at the top walks through the process. In the first step, uncheck the box that says “Include enrolled users” if it’s already checked. Everything else will stay the same. Then click “Next.”
2. Schema settings
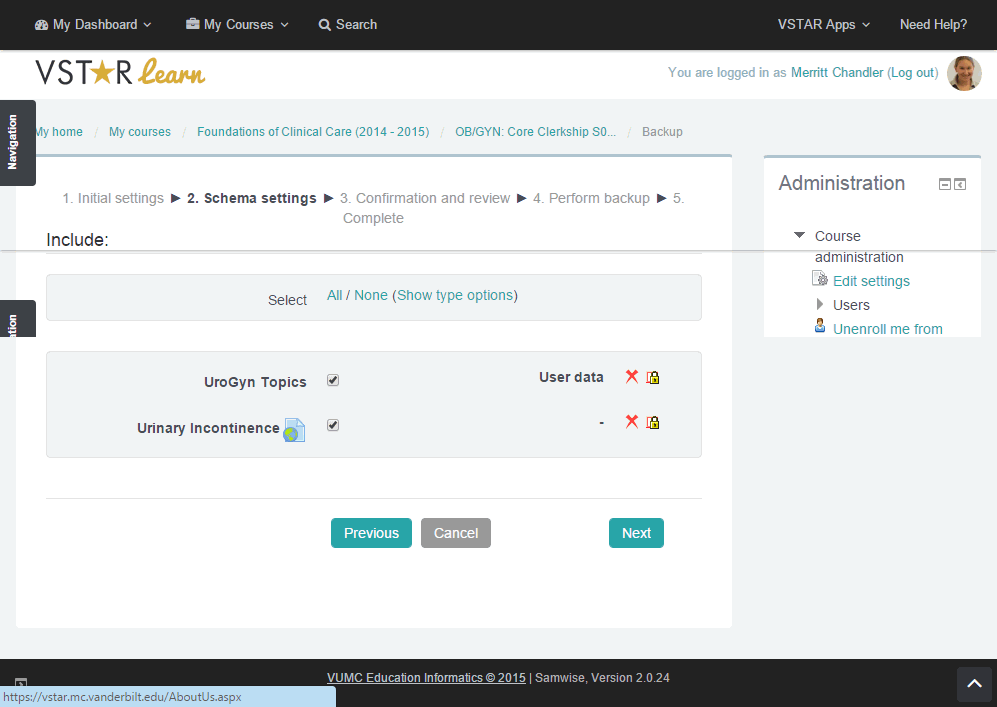
On the next page, the “schema settings,” no changes are required. Simply scroll to the bottom and click “Next.”
3. Confirmation and review
Step 3, the “confirmation and review,” requires no changes either. Scroll to the bottom and select “Perform backup.”
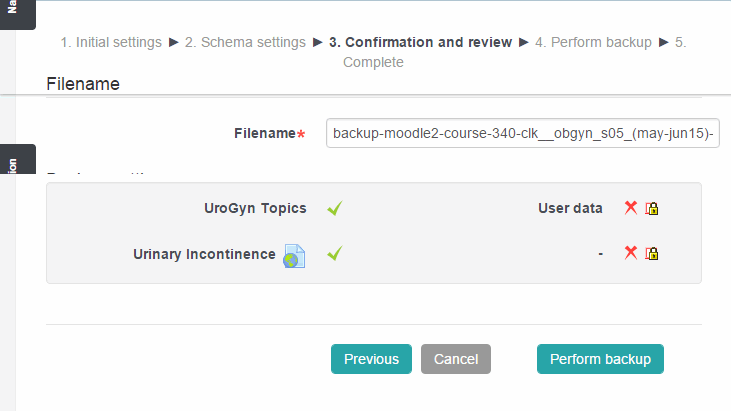
4. Perform backup & 5. Complete
The next step is the backup process. The file will process until you see the completed screen below. Keep in mind, for larger courses this can take a while, maybe up to half an hour. If you open another browser window, you can work on other things, but don’t navigate away from this page. When you see the completed screen, select “Continue.”
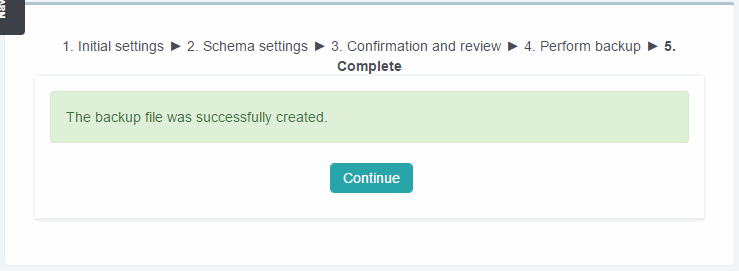
This will bring you out of the backup dialog and allow you to start the restore process.
Restore
Your backups are saved by the system. The file name is long, but will always include your course name and section number, as well as the date and time of the backup. From here, you can select to restore the backup into an existing course.

1. Confirm
The first step in the process is the “confirm” step. As when doing a backup, you’ll be faced with a long list of information about your course, including all the topics. This allows you to verify that you have selected the correct course for your restore. You do not need to make up any changes to this step, just scroll down and select Continue after you verify that you have selected the correct course.
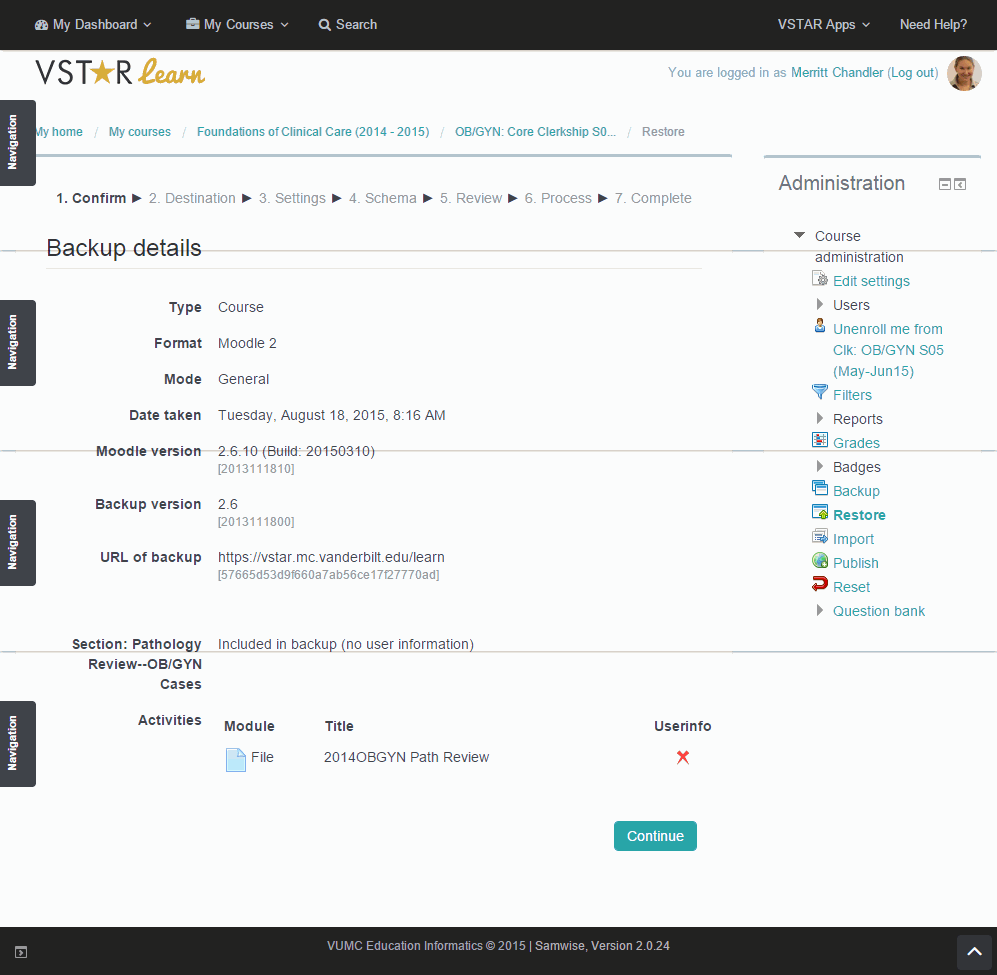
2. Destination
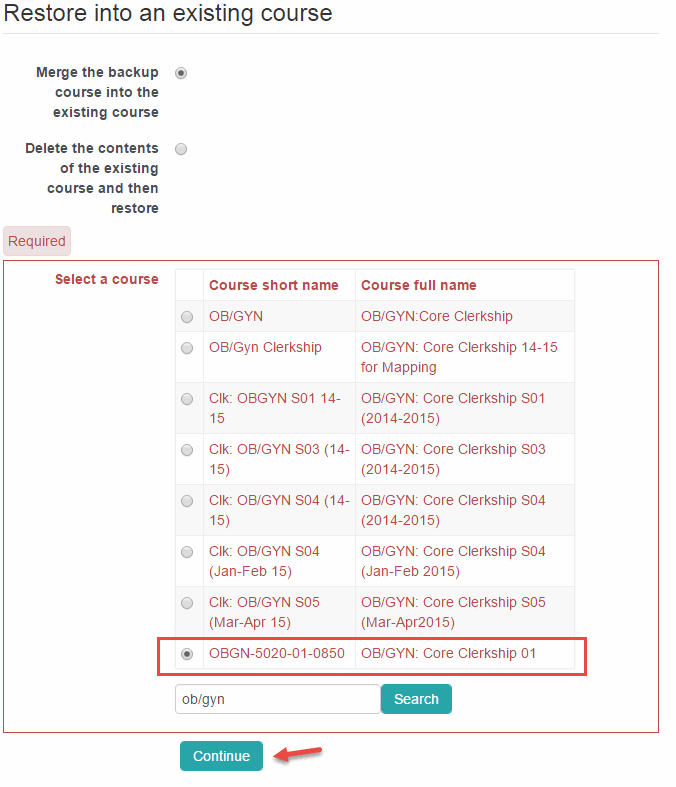
In this step, select where the course will go. We want to restore into an existing course, one created for us by Education Informatics. To do this, we need to direct VSTAR to find the correct course. This is a lot easier if we’ve already found our correct course and know the course number. Scroll to the bottom of the page, and under the “Restore into an existing course” header, select “Merge the backup course into the existing course.”
Then you’ll need to select the course. Your course is not likely to be in the list, so you’ll need to search for it. Type the course number in the search field and click search. The course number is the course shortname of the new course.
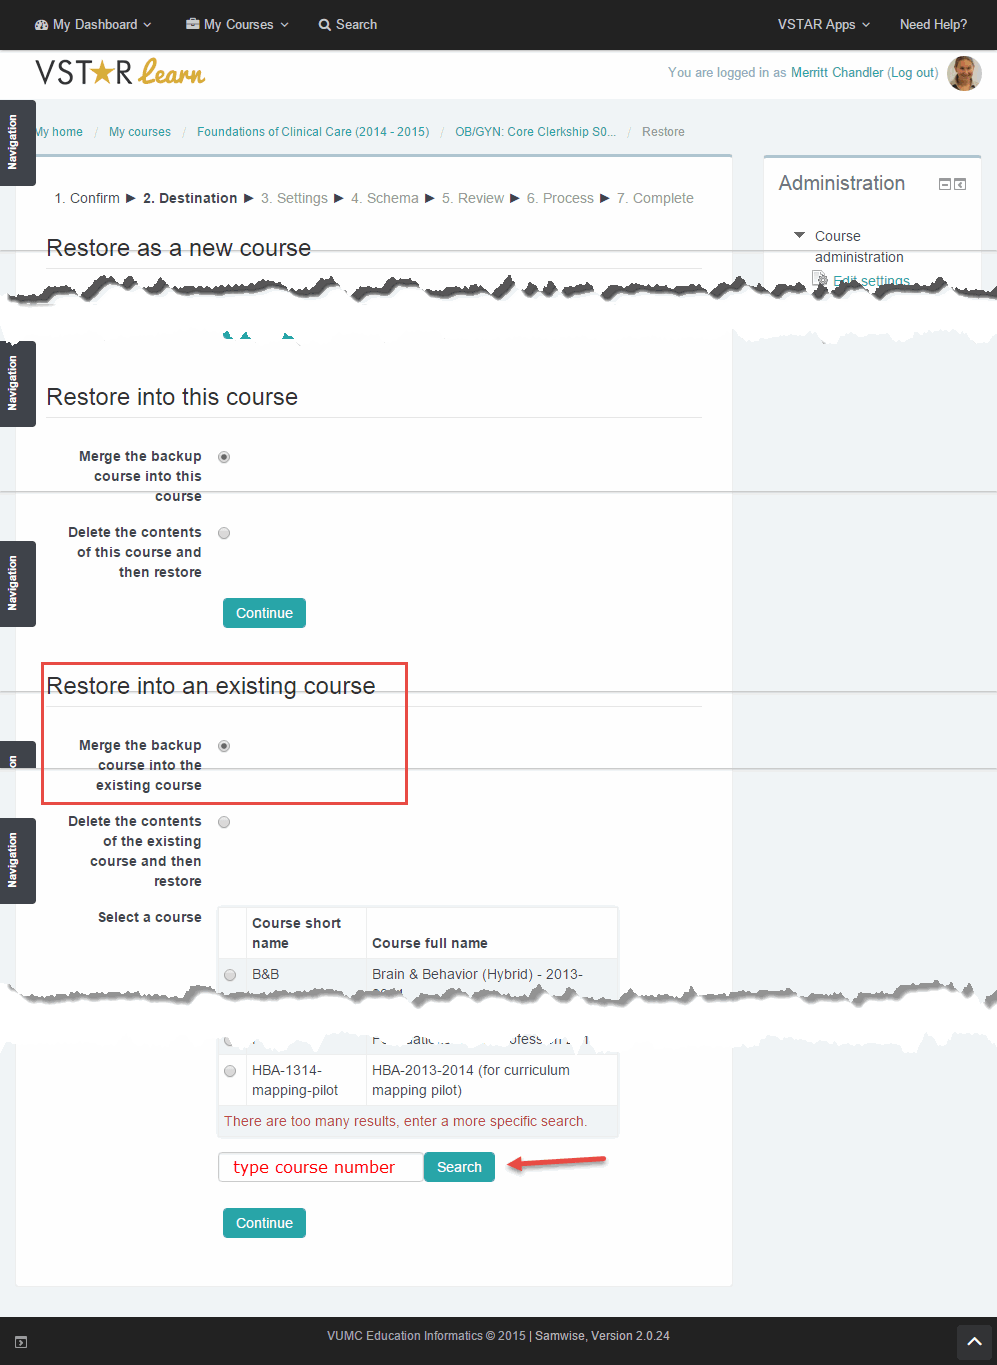
Once your course is listed in the “Select a course” box, you’ll need to select it and click “Continue,” even if it’s the only course listed after your search.
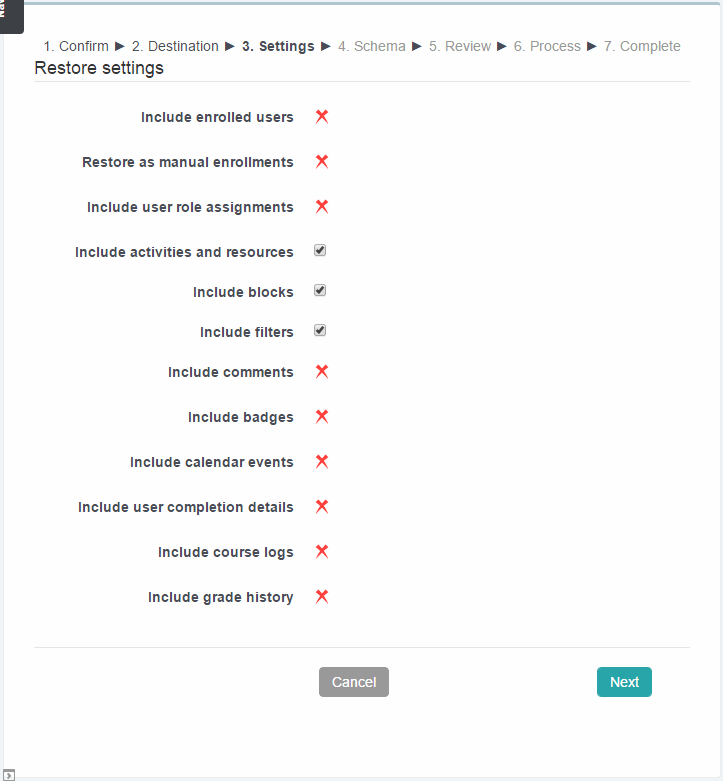
3. Settings
It’s unlikely you’ll need to make any changes at the “settings” step. Scroll down and click “next.”
4. Schema
In this step, basic course settings are pulled from the old course into the new course. Since you want to maintain the PeopleSoft link that will allow students to be enrolled in courses automatically, you need to change your course name and course short name to the name of the automatically created new course. You may also find it helpful to change the course start date to the date your course actually starts.
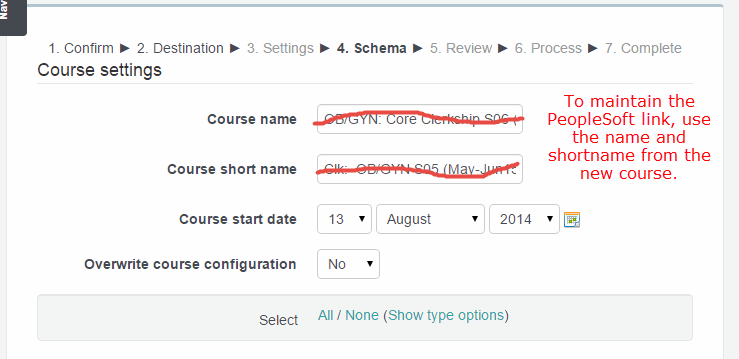
Nothing else in this step needs editing. Scroll to the bottom after you have changed the course name and course short name and select “next” to continue.
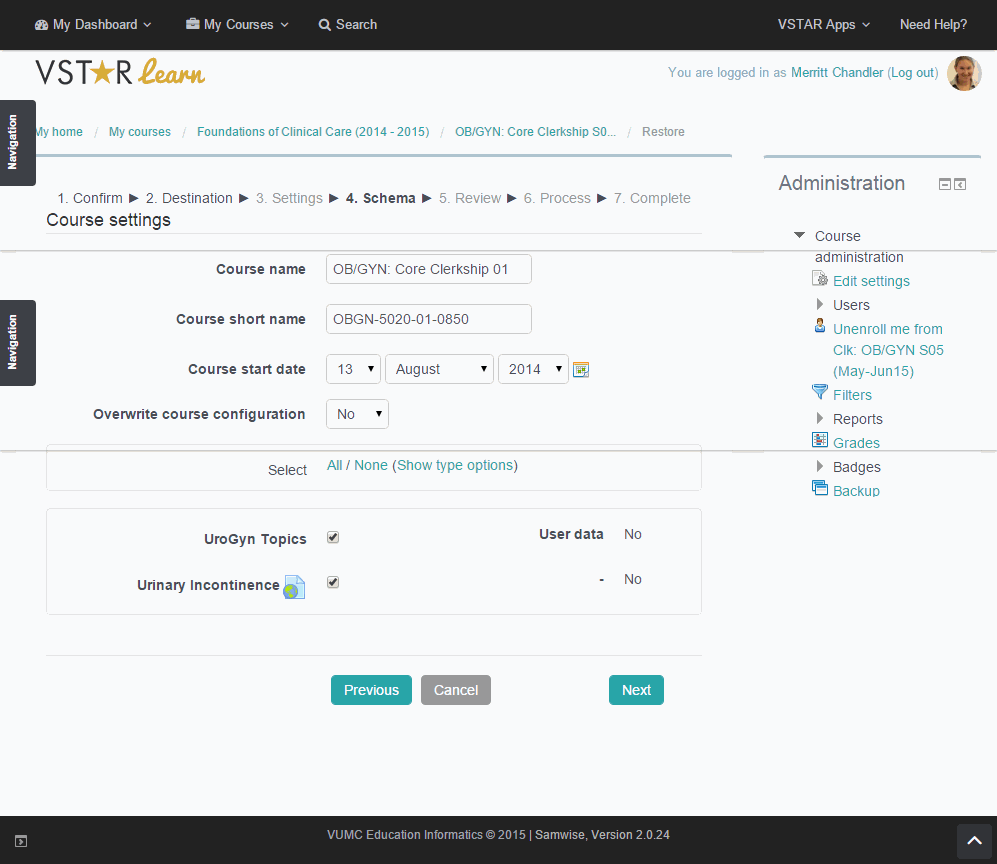
5. Review
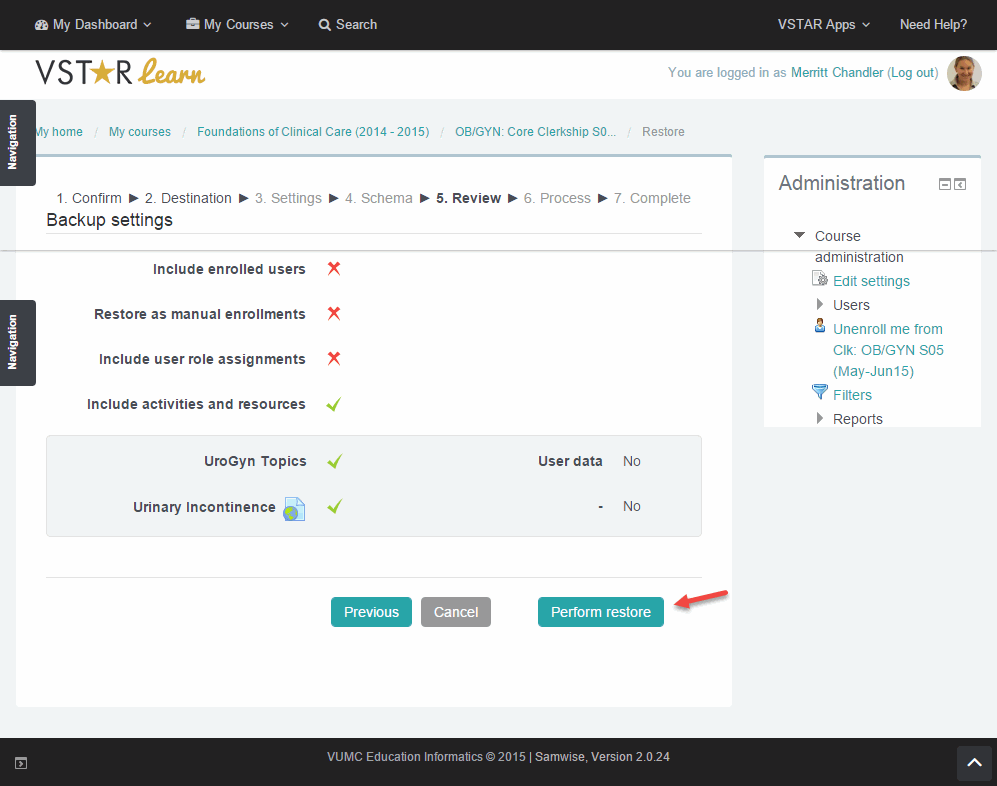
Scroll through and review the settings. No changes are required on this page. Click “Perform restore” to begin the process of uploading your old course into the new one.
6. Process
The upload process may take some time. You can do other things while VSTAR is working, but do not navigate away from this page.

7. Complete
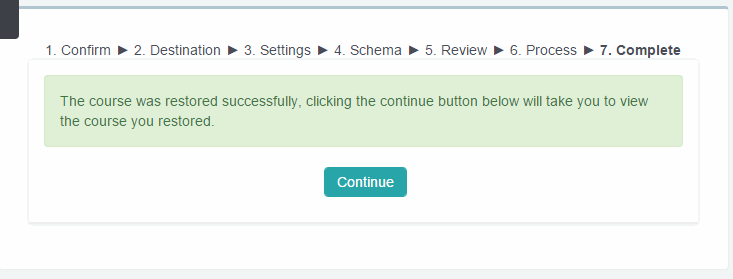
You will see the completion screen when the restore is finished. Click the “continue” button to be loaded into your course.
8. Enroll Course Directors
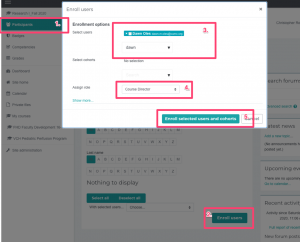
So that course directors have access immediately you should enroll them in the course.
- Click on “Participants”, then “Enroll Users”
- Search for the user and select
- Select “Course Director” from the “Assign role” section
- Click “Enroll selected users and cohorts”
Next Steps
Once your course is restored, scroll to the bottom of your new course and verify you have no “orphaned activities.” If you do, add new topics until these activities are in the topics where they belong.
All students and faculty should be enrolled automatically.

