When a course is created, topics are pre-populated, but they will have names like “Topic 1” and “Topic 2.” In most cases, a faculty member will want to change these names to better suit the information being delivered in a lecture, lab, or other learning session.
To make changes to the course page, first turn the editing on by clicking the “Turn editing on” button in the upper right hand corner of the course page.
A few extra icons will appear on the page when editing is turned on. Go to the topic you would like to edit and click on the “options” symbol – it will look like a gear:
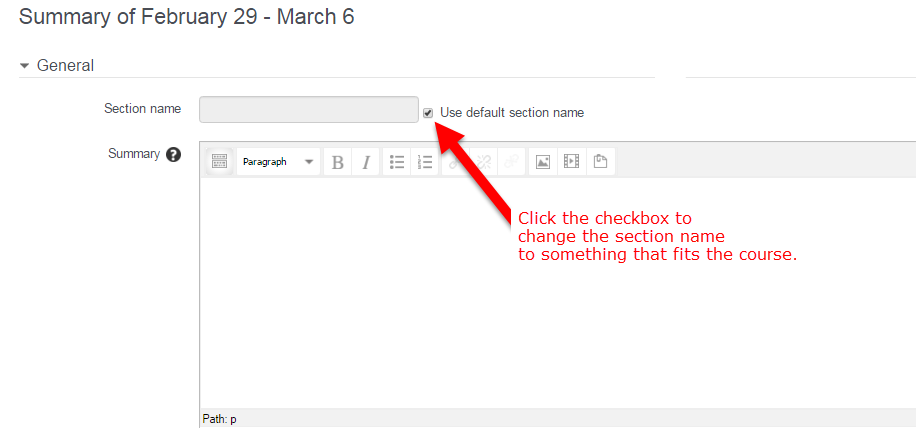
This brings up the editing window. The name of the topic is locked initially. To change it, uncheck the box that says “Use default section name.”
Now you can change the topic name. Name your topic something that fits that particular portion of your course.
This page also includes a summary box. This box is optional. Any information displayed in this box will appear on the course page. Since this is tied to the topic, certain course settings that hide information under a topic will display information in this box but other activities and resources included under the topic will be displayed on another page, so in that case it may be useful to keep the summary short.
This summary box is a fully functional HTML editor, called the TinyMCE editor, and it appears elsewhere in Spark Learn. Links and images can be included in this box.
Once you’ve updated your topic information and included any summary information, be sure to click save to update your topic information!
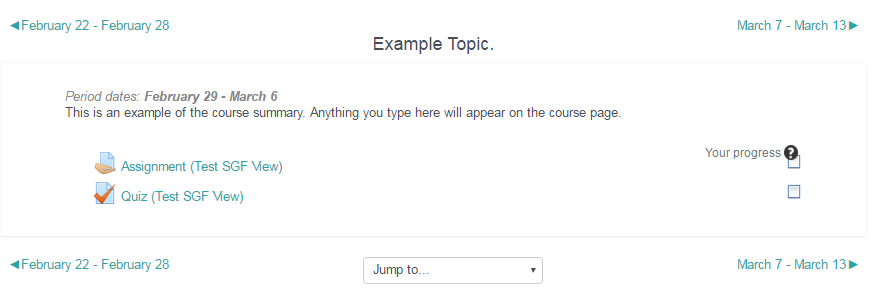
After you save the topic, navigate to the course page. Scroll down and select the topic to display the updated topic with a summary, activities, and resources.


