A voiced over PowerPoint file can be loaded “as is,” into a course, saved as that PowerPoint file for students to view, or, it can be saved as an .mp4 video file and uploaded to one of our video sites and embedded into the course. The following instructions will work with PowerPoint 2010., 2011, or 2013. Start with an existing PowerPoint presentation, and be prepared to narrate. We recommend creating a script to assist you during the narration process, finding a good microphone, and a quiet place. Many computer microphones are good enough, but a headset microphone will make the presentation more clear for your students.
Save a copy of your presentation without the narration, in case you need to go back to it.
NOTE: If you record an audio clip on each slide and don’t record your slide show with timings as indicated here, you will not be able to make your presentation into a video. You should still be able to save your presentation as a PowerPoint file and upload it to VSTAR, but the timings of your narrations are not recorded by PowerPoint so it will not automatically save a video. If you need a video and would prefer to record slide by slide, you can, just make sure you do so as indicated in Step 2, use this method, and record timings.
Step 1 – Prepare for Recording
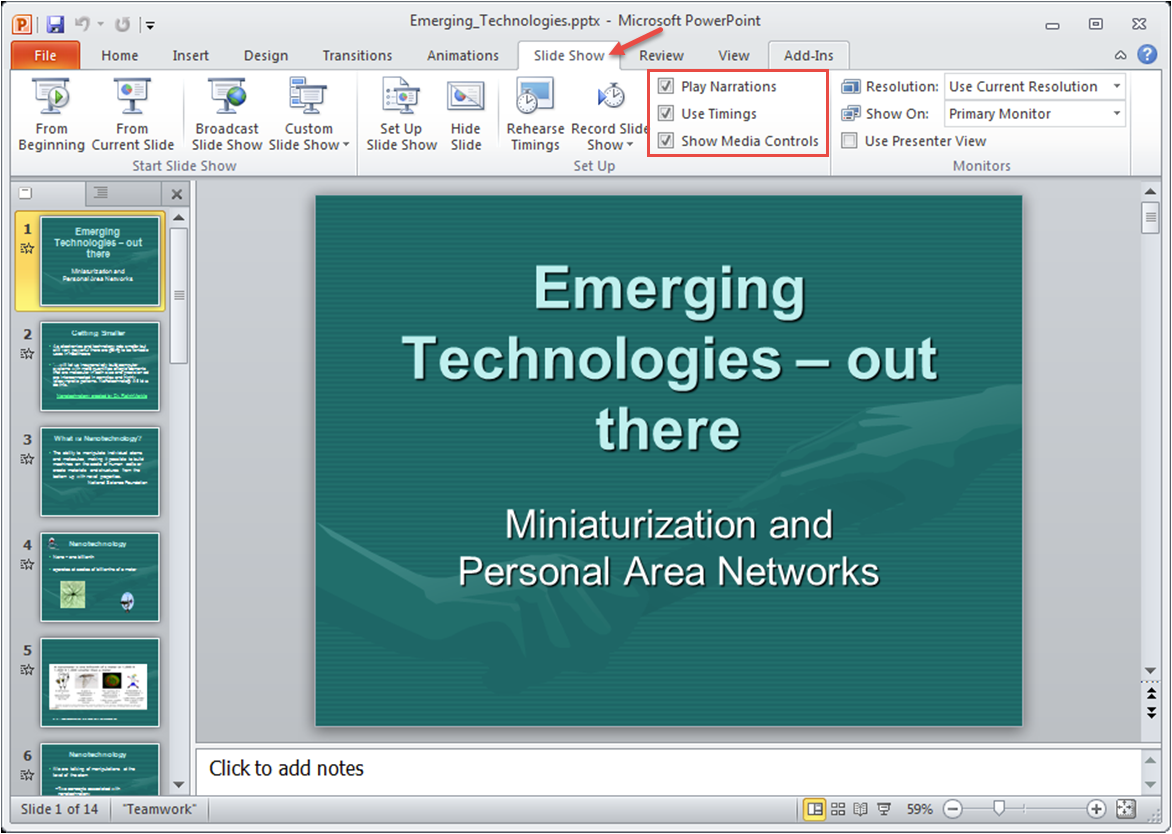
Open the copy of your PowerPoint presentation that is ready for narration. Click “Slide Show.” Check “Play Narrations,” “Use Timings,” and “Show Media Controls.”
Step 2 – Record
Now click on “Record Slide Show.” You can choose to either “Start recording from Beginning” or “Start recording from Current Slide.” Recording from the beginning will let you record the entire slideshow at once. Recording from the current slide will let you record one slide at a time. If you choose to record one slide at a time, you must record it within “slideshow mode.” Recording the slide audio on the slide itself will not capture the slide transition timing and will not allow you to turn the slide into a video.

Recording audio is very different from lecturing to students. We highly recommend writing out a script. If you use two monitors, you can use the “notes” function in PowerPoint to record your script for each slide, and read off the screen. If not, you can still use the “notes” function, and then print your notes.
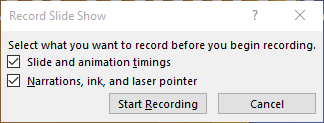
Once you’ve selected to record, PowerPoint will ask you if you want to record with “Slide animations and timings” and “Narrations, ink, and laser pointer.” Make sure BOTH of these boxes remain checked. Then select “Start Recording.”
Continue to advance slides and record audio.
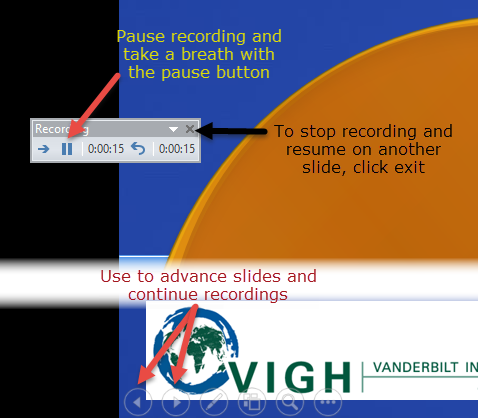
Exit at any time, and take breaks when necessary. Save the file whenever you take a break!
If you need to re-record a slide, you can do so by going back to “Record Slide Show” in PowerPoint again and selecting “Record from Current Slide” on the slide you need to correct, then exiting before you get to the next slide. Do not click the right arrow to go to the next slide, as you will remove the next slide’s recording.
Step 3 – Publish Recording as Video
Save the PowerPoint presentation. When you are satisfied with your recording, you will need to create your video.
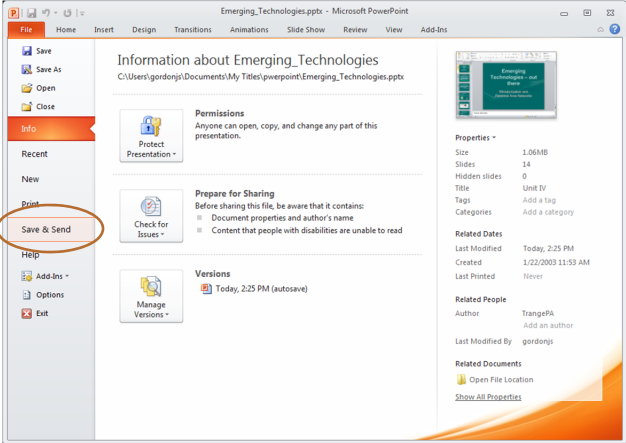
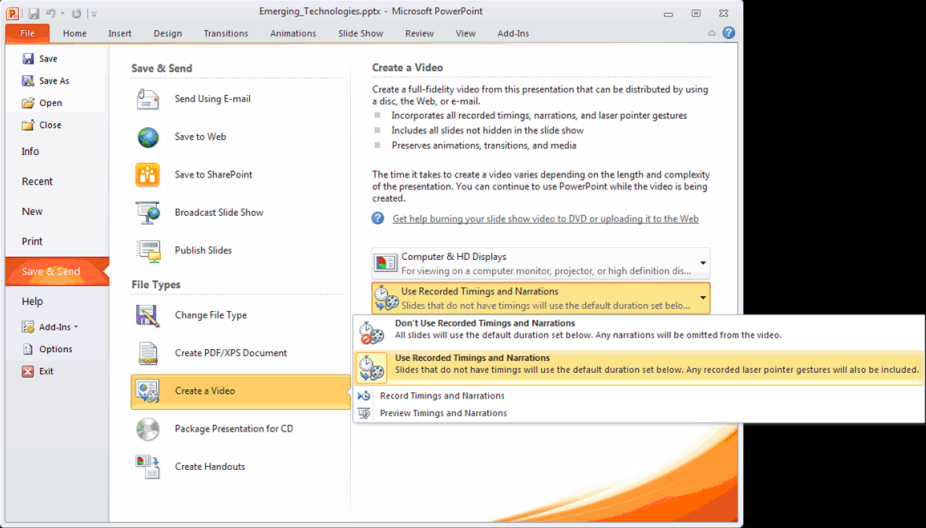
Click on the “File” tab, then click “Save and Send.” (In PowerPoint 2016, you’ll select “Export.”)
Then click “Create a Video.” Select “Use Recorded Timings and Narration” from the submenu.
Then click the “Create Video” button on the screen. Save it where you can find it. It will save as a .wmv file. This will take some time, perhaps several hours, depending on the speed of your computer and the length of the presentation. You may want to start it before you leave in the evening, or before dinner at night, and it will be done in the morning.
Step 4 – Load to VSTAR
You can give your video to your course coordinator to load for you, or follow these steps to upload your video to Freeform and then to VSTAR.