Working with Compass Assessments
(this is an administrative function)
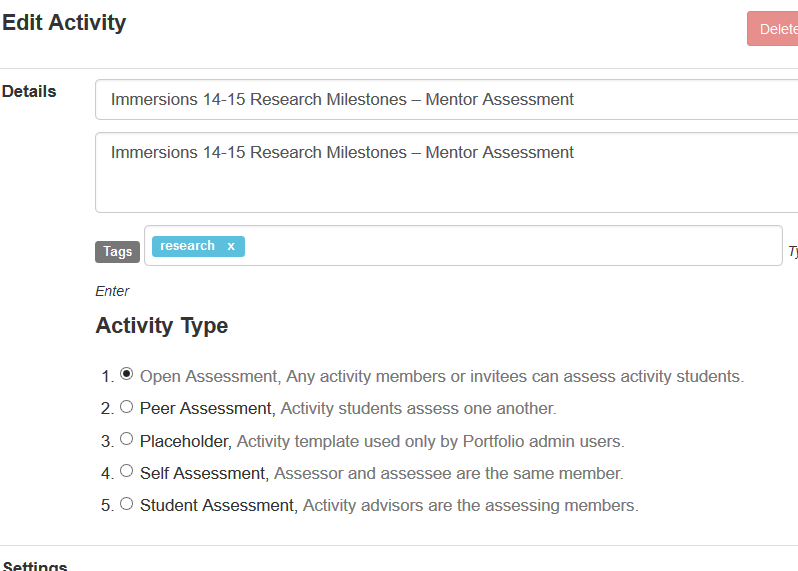
A “Compass Assessment” in Portfolio is used when you want to invite people from outside of Vanderbilt to participate in an assessment. Also an activity must be an compass assessment if it needs to be utilized in VSTAR Compass. To set an Activity as a Compass Assessment, click on the “Compass Assessment” radio button in the Activity Type section:
Choose the rest of the settings as you would in any other Activity, though it is advised not to use the following features:
- Hide results from Monitor / Portfolio Coach?
- Enable Discussion?
- Anonymous Response?
- Enable Alerts?
When setting up Groups you will want to include all students that will be assessed, but it is not necessary to include invitees in the Group, and it is important to remember that Compass Assessments do NOT show in an Advisor’s “My Activities.” The only way to get to the assessment is to receive the unique link created for each individual invitee. (Or have a student send out a request for feedback via VSTAR Compass.)
To create a Group, click the green “Create a New Group” button:

To change the name of the group, click on the Group Name:
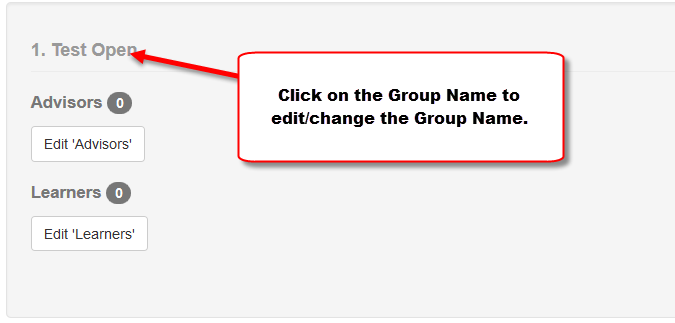
Then type in the name you would like to use for the group:

It is important to name your group something you will remember.
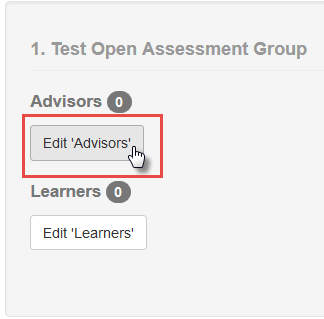
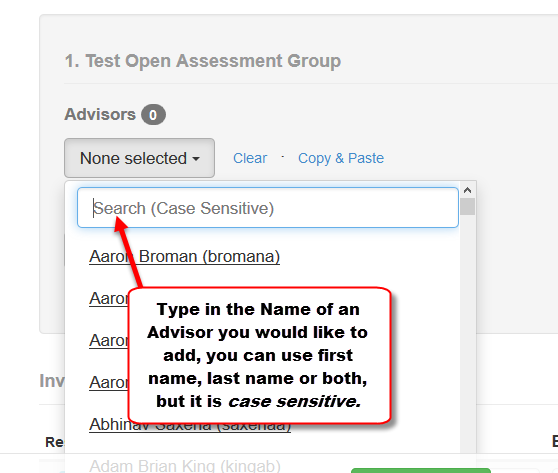
To add advisors and students, Click on the Edit ‘Advisors’ button or the Edit ‘Learners’ button and then choose the advisors and students you wish to include. Remember all students to be assessed must be in a group.
To add invitees, scroll down to the “Invitees” section:

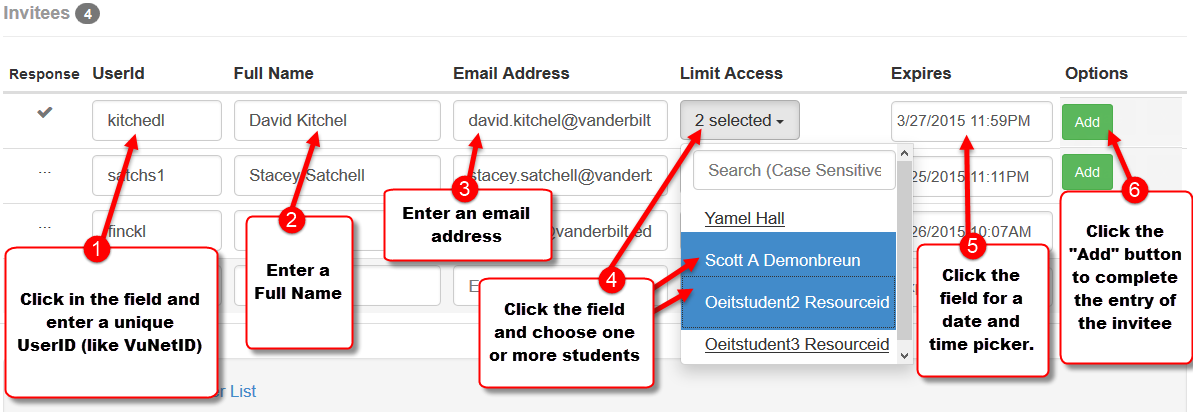
To create an invitee you need to complete the following steps:
- enter a unique “UserID (for Vanderbilt users you should use their VuNetID)
- enter a “Full Name”
- enter an “Email address”
- choose the students to be assessed under “Limit Access” (you have the option to choose more than one)
- enter a date and time the invitation “Expires” (the date can’t be later than the due date)
- click the “Add” button to save your entry
Once you have added all of the invitees, you are ready to send out the invitations, which is done by clicking on the “Send notifications to Activity members” link in the “More Options” section:

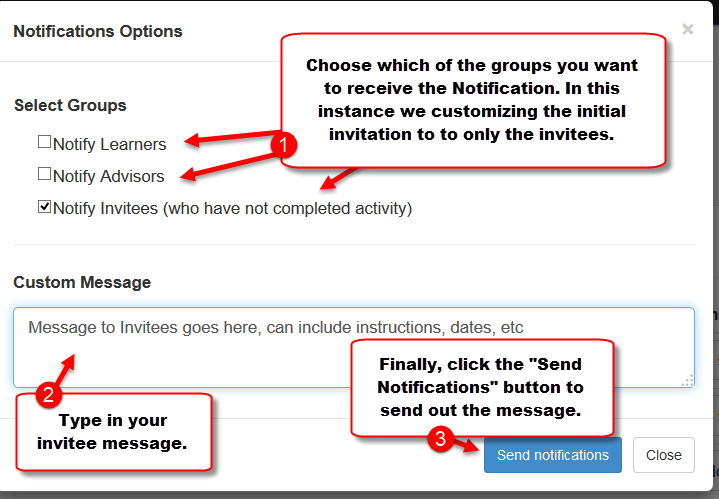
Select the “Notifications Options.” If we want to send out the initial invitation to the invitees, we would deselect “Notify Learners” and “Notify Advisors” and keep “Notify Invitees” checked. Then we would enter a message customized for the new invitees. This might include instructions, time frame and other information for users unfamiliar with the VSTAR Portfolio system. When ready press the “Send Notifications” button:
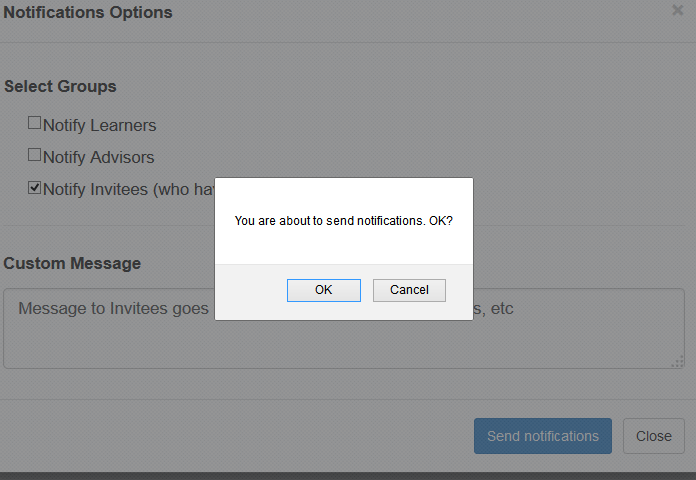
Then click OK to confirm:
When successfully sent, click close:

After there have been some completed views and/or assessments, you can see this indicated in the “Invitees” Section under the “Response” column:

Further information about notifications becomes available after Invitees have completed an assessment. They can be seen in the “More Options” section at the bottom of the Activity:

See also View Report of Student Requested Compass Invitees and Progress on Assessment.
