Creating a Basic Form in VSTAR Portfolio
The form builder is only available to those with Admin or Super User status within the Portfolio system. If you believe you need to build forms and you do not have this level of access, please contact us by clicking on the “help” icon menu ribbon at the top of your VSTAR session and then click the green “Open New Ticket” button.
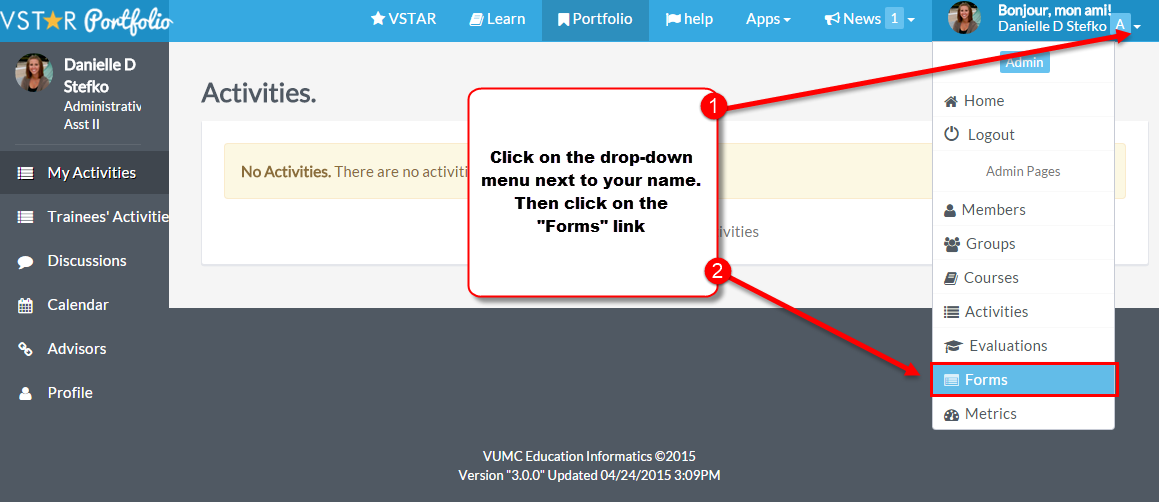
If you need to create a simple, basic form for an assessment in VSTAR Portfolio, it is easy. After you logon, just click on the drop-down menu next to your name. Then click on the “Forms” link:
Click “Create New Form”:

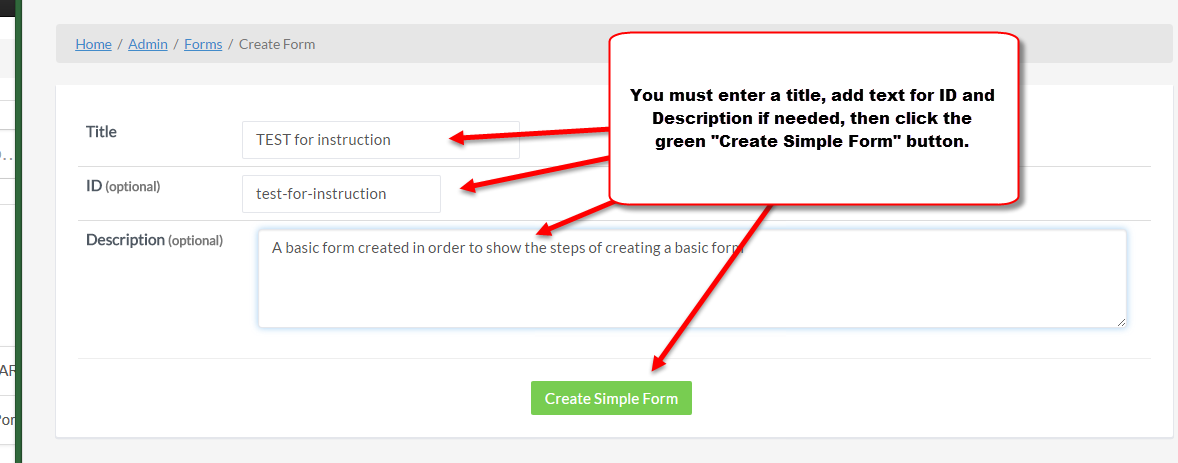
At the beginning of the form creation, you must enter a title, then add text for ID and Description if needed, then click the green “Create Simple Form” button.
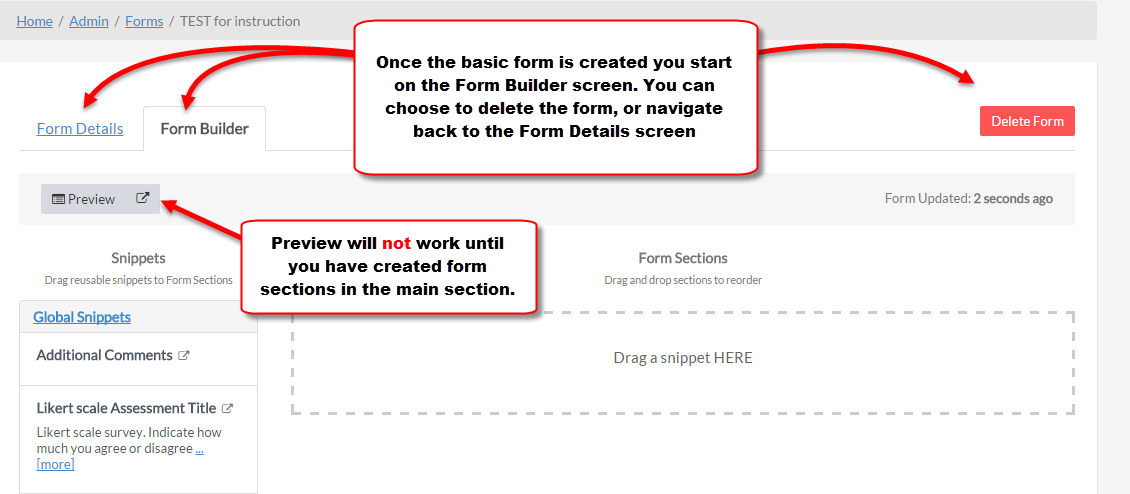
Once the basic form is created you start on the Form Builder screen. From here you can choose to delete the form, or navigate back to the Form Details screen:
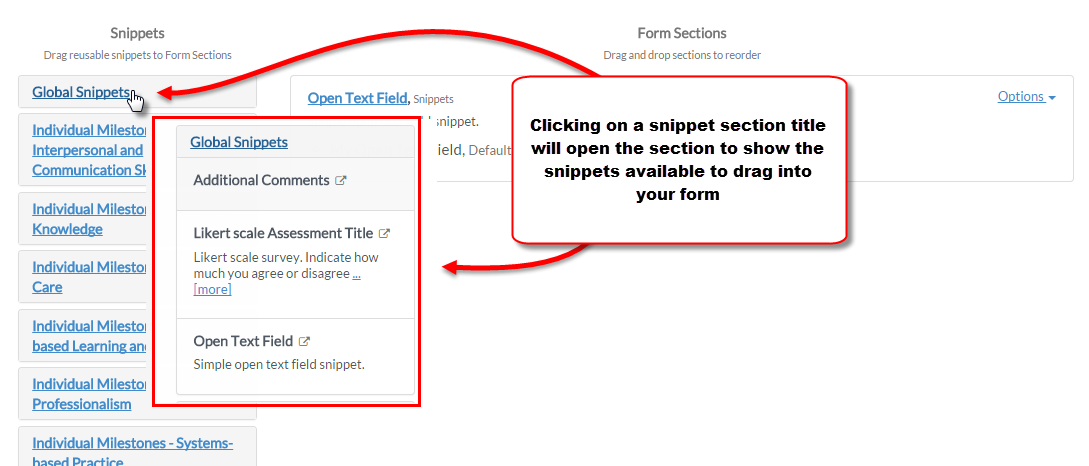
But first you want to start adding components to your form. In the builder these are called “Form Sections”– and in the basic form builder you can only add sections which have already been created. These are called “Snippets.” In the Snippet Navigation bar at the left are some “Global Snippets” and also various Milestones. Clicking on a Snippet section will display the Snippets in that section.
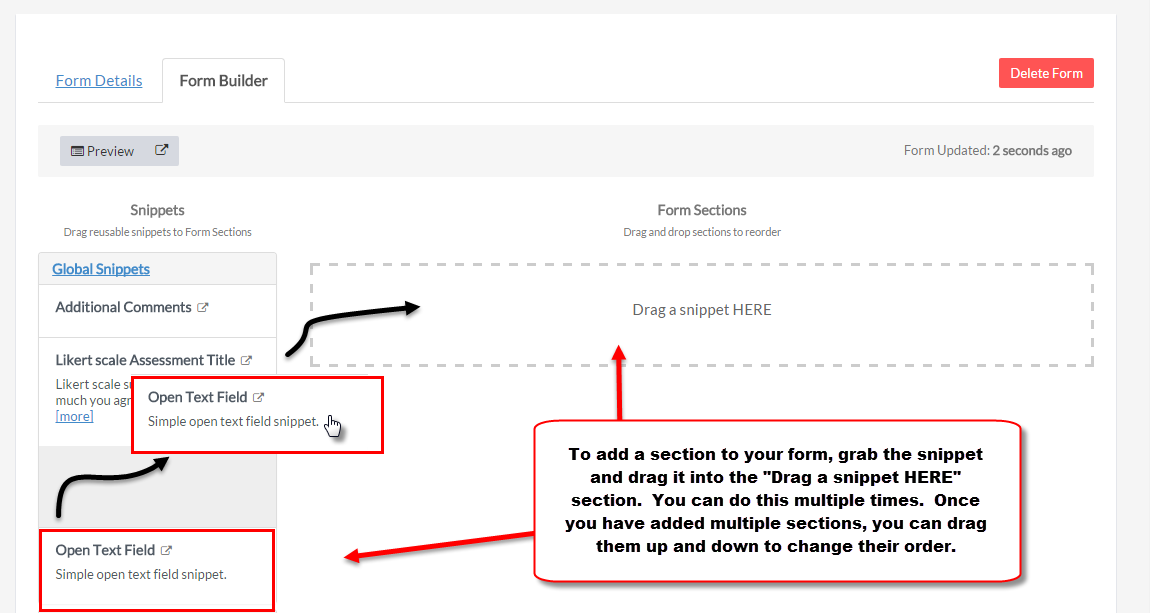
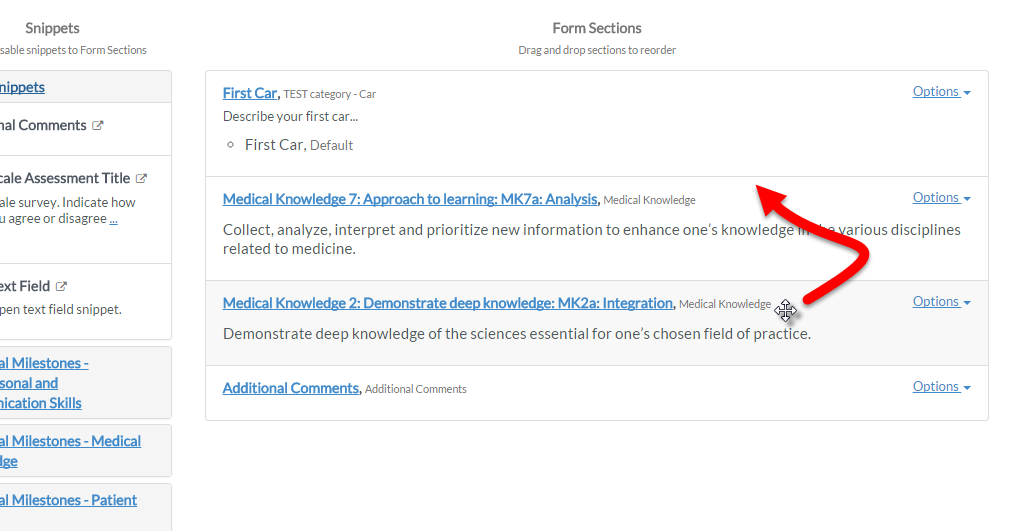
To add a section to your form, grab the snippet from the snippet section on the left side and drag it into the “Drag a snippet HERE” section. You can do this multiple times. Once you have added multiple sections, you can drag them up and down to change their order:
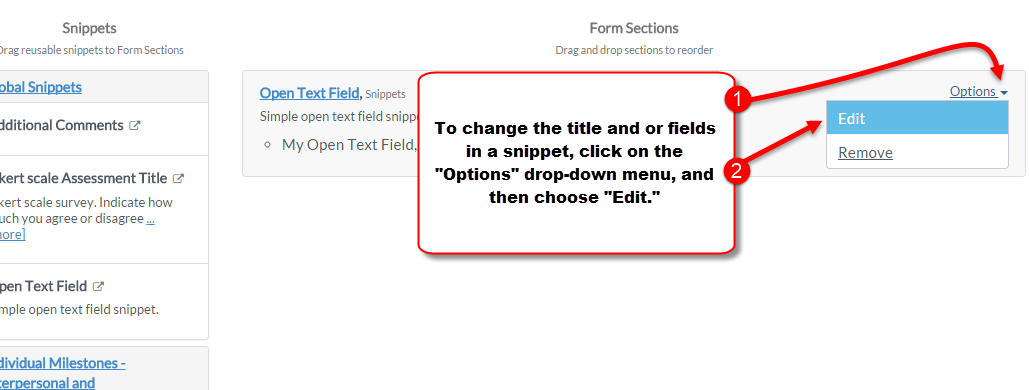
To change the title and or fields in a snippet, click on the “Options” drop-down menu, and then choose “Edit”:
Is is best NOT to edit the Individual Milestones so that certain that the competency mapping system process works as designed.
In the section editor, you can edit the text in four different sections: Category, Section Title, Description and Label:
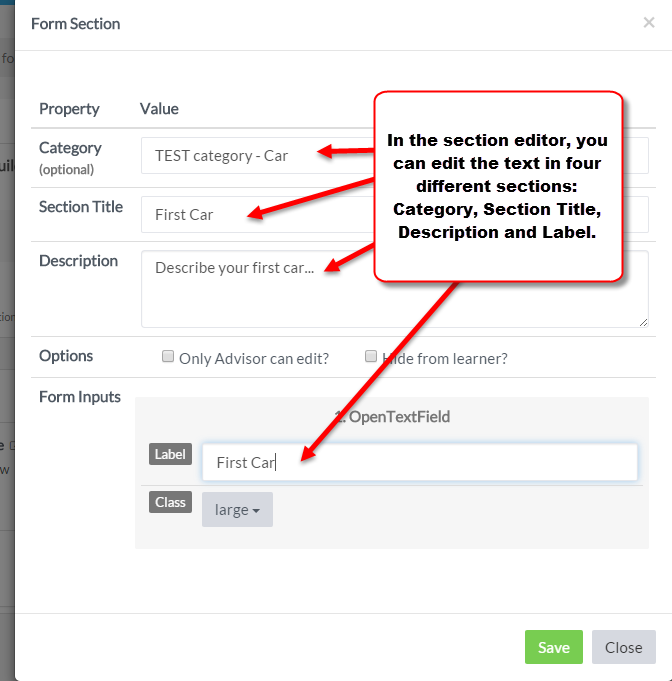
Though you most likely won’t use it, you can check the “Only Advisor can edit” box and/or the “Hide from learner” box. The “Only Advisor can edit” box makes so only advisors in the activity can make choices or add text to that section. The “Hide from learner” box hides the input for the learner and makes it visible only to the advisors or other approved faculty.

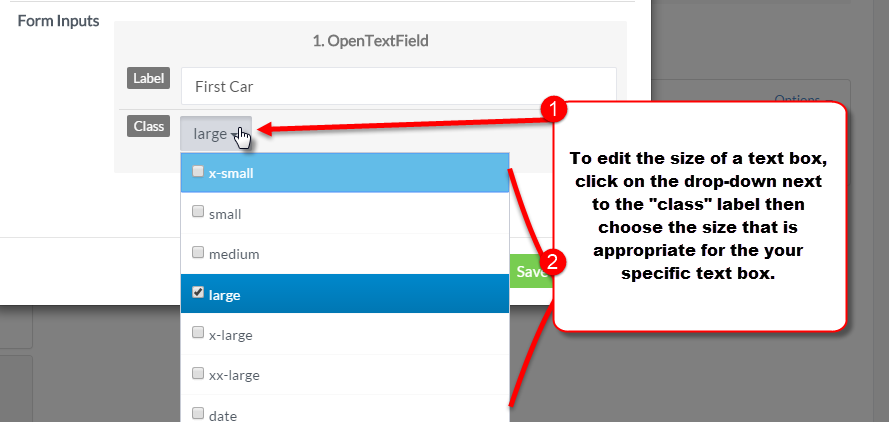
For Open Text fields you may want to adjust the size of the text box where the assessor can enter text (to make it smaller if you expect one or two word inputs, or larger for a great deal more text.) To edit the size of a text box, click on the drop-down next to the “class” label then choose the size that is appropriate for the your specific text box:
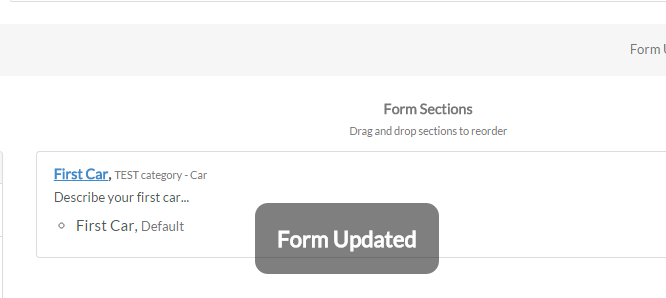
When you finish editing a section the form will automatically update, and display “Form Updated” in a bubble:
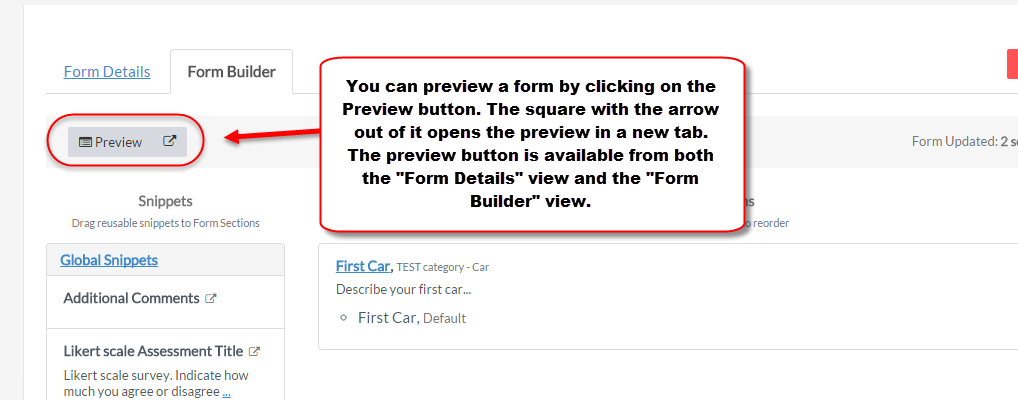
After you have created at least one section and the form has auto-updated, you can preview the form by clicking the “Preview” button. The preview button is available from both the “Form Details” view and the “Form Builder” view. The square with the arrow out of it opens the preview in a new tab, while “preview” will open the preview in a pop-up window:
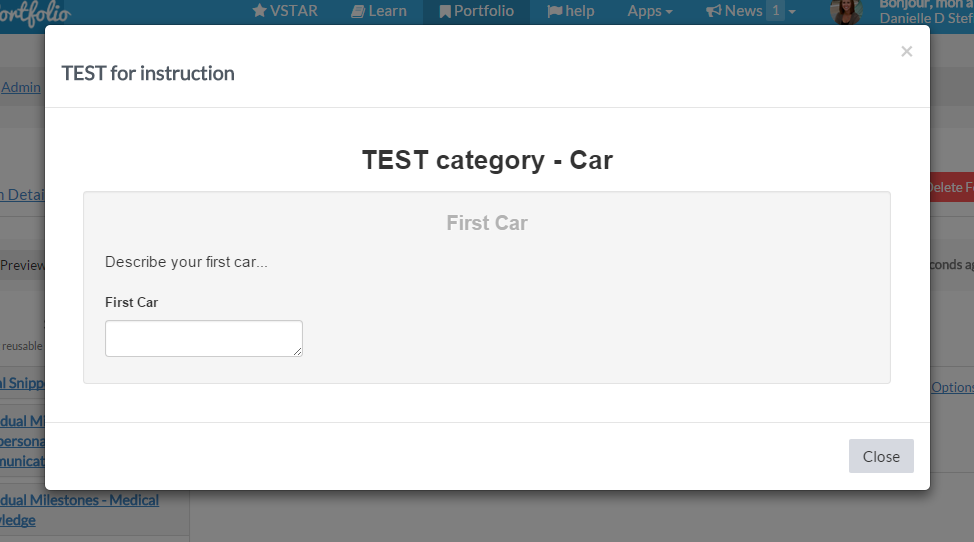
Preview in a pop-up:
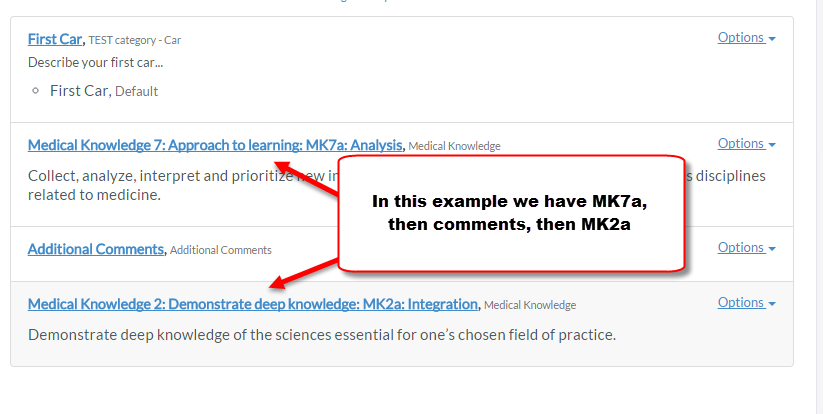
Once you have more than one section created, you can re-arrange them by dragging them up and down:
It is important to note that when you re-arrange sections of the same competency domain, these will be displayed together in the forms “Table of Contents.” In this example we have arranged the section in the following order: MK7a, then Additional Comments, then MK2a as seen below:
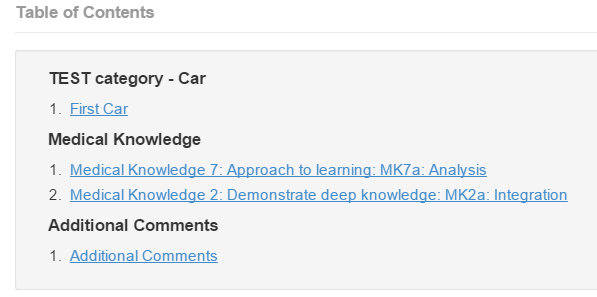
They will appear in that order in the form, but the table of contents will group them together by domain:
If you want to remove a section, click on the “Options” drop-down menu, and then choose “Remove”:

When you are finished editing and previewing the form you can open an activity and associate your form with that activity. Open the appropriate activity and click on the drop-down selection “Link to Form”:

Next, type in the beginning text of your form’s title (case sensitive), find your form in the list and click on it:

Press the green “Save” button to ensure your changes to the activity are saved: