Video Tutorial
VSTAR Log In
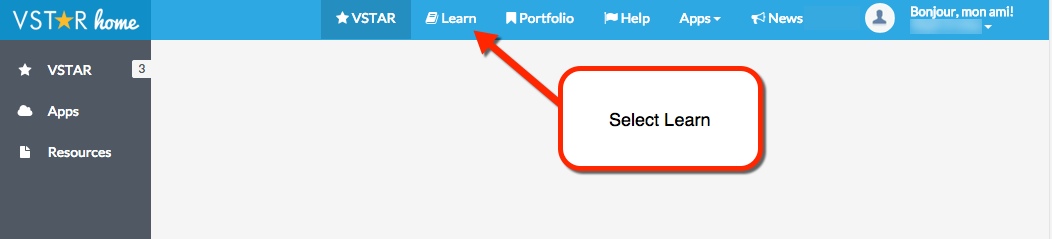
This module will walk you through enabling edit mode in VSTAR Learn. You will begin by logging in to VSTAR. Then select Learn from the blue navigation bar at the top of the page.
Enable Editing
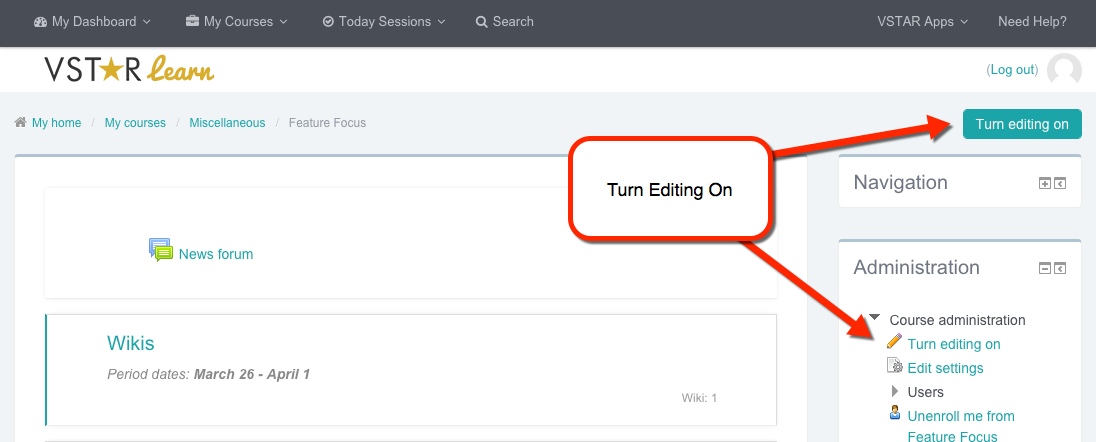
In order to make changes to your course, the first step is to enable editing. To do this, navigate to your course, then click the “Turn Editing On” button.
There is also a link to turn editing on in the “Administration” widget on the right hand side of the page. (Note: The order of your page is customizable, therefore the widgets discussed in this option may be in a different order.)
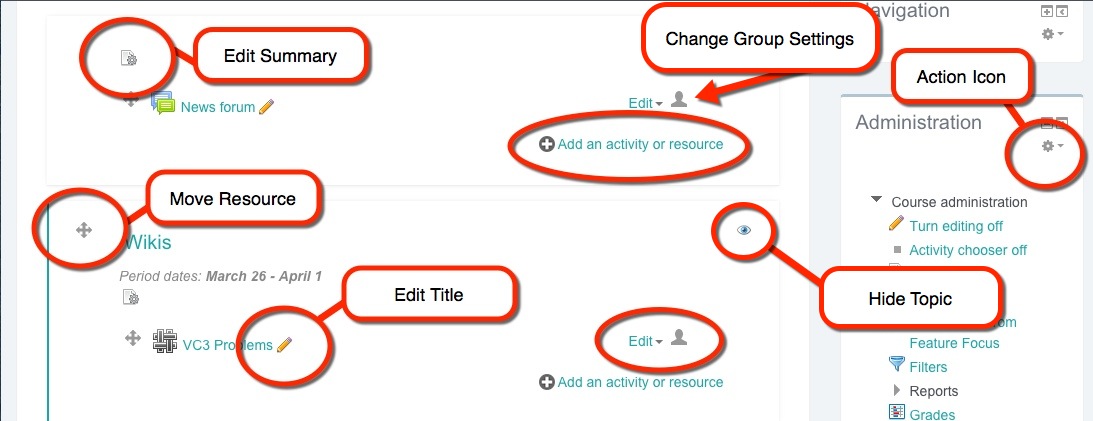
Once editing has been enabled, notice the following options become available:
- Action – Each widget will have an Action Icon enabled. The Action Icon will have various options depending on which widget you are editing and allows you to assign roles.
- Edit Summary – Available under the main course section. This option allows you to edit the course summary.
- Edit Title – This pencil icon allows you to alter the title of your activity or resource.
- Move Resource – This option allows you to move the available activities and resources to a different position.
- Edit – Available with every Activity / Resource. This option opens a drop-down list with the following choices: Edit Settings, Move Right, Move Left, Hide, Duplicate, Assign Roles, and Delete.
- Add an Activity or Resource – Opens a pop-up window containing all of the activities and resources you can add to a section.
- Group – Changes the group settings for a specific activity or resource. Clicking the icon will cycle through No Groups, Separate Groups, and Visible Groups.
- Hide – Allows you to hide the topic from student’s view. Section will dim out in editor’s view, but will still be available. Hide icon will be crossed out. To Unhide the topic, click the hide icon again.
Two additional icons are also available in editing mode at the bottom of the page.
- Increase Sections – Selecting this option will add an additional section to the bottom of your list.
- Remove Sections – Selecting this option will remove the last section from your list.

After editing, be sure click the “Turn Editing Off” button or select the “Turn Editing Off” link in the Administration widget.
